Archive | squash RSS feed for this section

Another Turkey Day Trial including Butter Broth

21 Nov

img_4757

It’s always fun this time of year to watch all the Thanksgiving shows and read the magazines and ogle at all the lovely decorations that publishers set up probably back in July while sweating their you-know-whats off.  It definitely gives people the sense – the feeling – that something special is in the air.  And if a show or a magazine actually inspires someone to recreate the look, or the dish, or the decoration, then they’ve done their job.

And each year it seems like there is some fad or idea that weaves its way through our nation.  Some of those things have stuck around (surprisingly, I can’t believe people are still deep frying whole turkeys), and some thankfully fade (no MSG-injected birds, please).

This year, it seems the stuffed turkey breast roulade is the thing to make. I did this a couple of years ago for a Friendsgiving, and it was beautiful once cooked, sliced, and plated.  If you are one of those people that can’t look into the cavity of a turkey without gagging, let alone stick your arm up in that thing, then the roulade is for you.  Compared to a whole 16 pounder, the roulade takes much less time to cook, and with the right amount of butter, seasoning, and herbs, it still makes the house smell delicious.

Even with all that being said, it’s still not my favorite way to cook turkey.

My parents used to joke when I was little that I needed a divided cafeteria tray for my Thanksgiving meal.  Sometimes, I would have three plates in front of me – my dinner plate, salad/relish plate, and a bread plate – all because I didn’t like my food to touch.  Can you believe that?  Me.  With Thanksgiving food OCD.  The gravy could not and would not touch anything but the mashed potatoes.  And putting veggies even close to the turkey?  Ludicrous.  I would eat the cranberry sauce last (I still do that), and would always take more stuffing then I could finish.

When it comes to stuffing and roulading a turkey breast, it’s fun and all, but too much Thanksgiving food touching.

My secret it out.

To balance my vulnerability here, I’ll provide a little bit of fairness to this strange squabble (and mind you, this is a blog, so there really isn’t an argument unless you call this arguing with myself, in which case there are some other issues at hand besides food touching).  People love white meat, especially turkey white meat.  Now, these people may change their mind once they try one of those big ol’ turkey legs from a cart at Disneyland, but I digress.  The thing with turkey breast is that they are bland, especially without a bone.  Thus, all the fuss around the stuffing, and the butter, herbs and spices – sometimes possibly a brine – that are needed to make a Thanksgiving turkey a tasty treat.

So for this part of the Turkey Day Trials, I thought about what could keep a turkey breast tasty, after the cooking, without stuffing it.  Whether you are a bone-in or boneless fan, stuffed or plain Jane, something just had to work for all stages and styles of turkey breast to make it the easiest to cook yet tastiest to eat.   Then, the Sage Butter Broth was born.

img_4764

I’ve used the trick of pouring a bit of chicken broth over cooked turkey to help it keep moist.  But what about all of the flavor that everyone loves on the outside (or inside, if stuffed) of the bird?  With that in mind, I made a butter broth.  Yes, you read that correctly.  Butter.  Broth.  And you heard it here first, folks.

I made the Sage Butter Broth by whisking 1 cup of low sodium chicken broth, a good 1/2 tsp of sea salt, a large sprig of sage and ½ a stick of unsalted butter together over medium-low heat in a sauce pan.  After the mixture had emulsified into one and was fragrant with sage, I poured it over the cooked (and rested) sliced turkey breast.

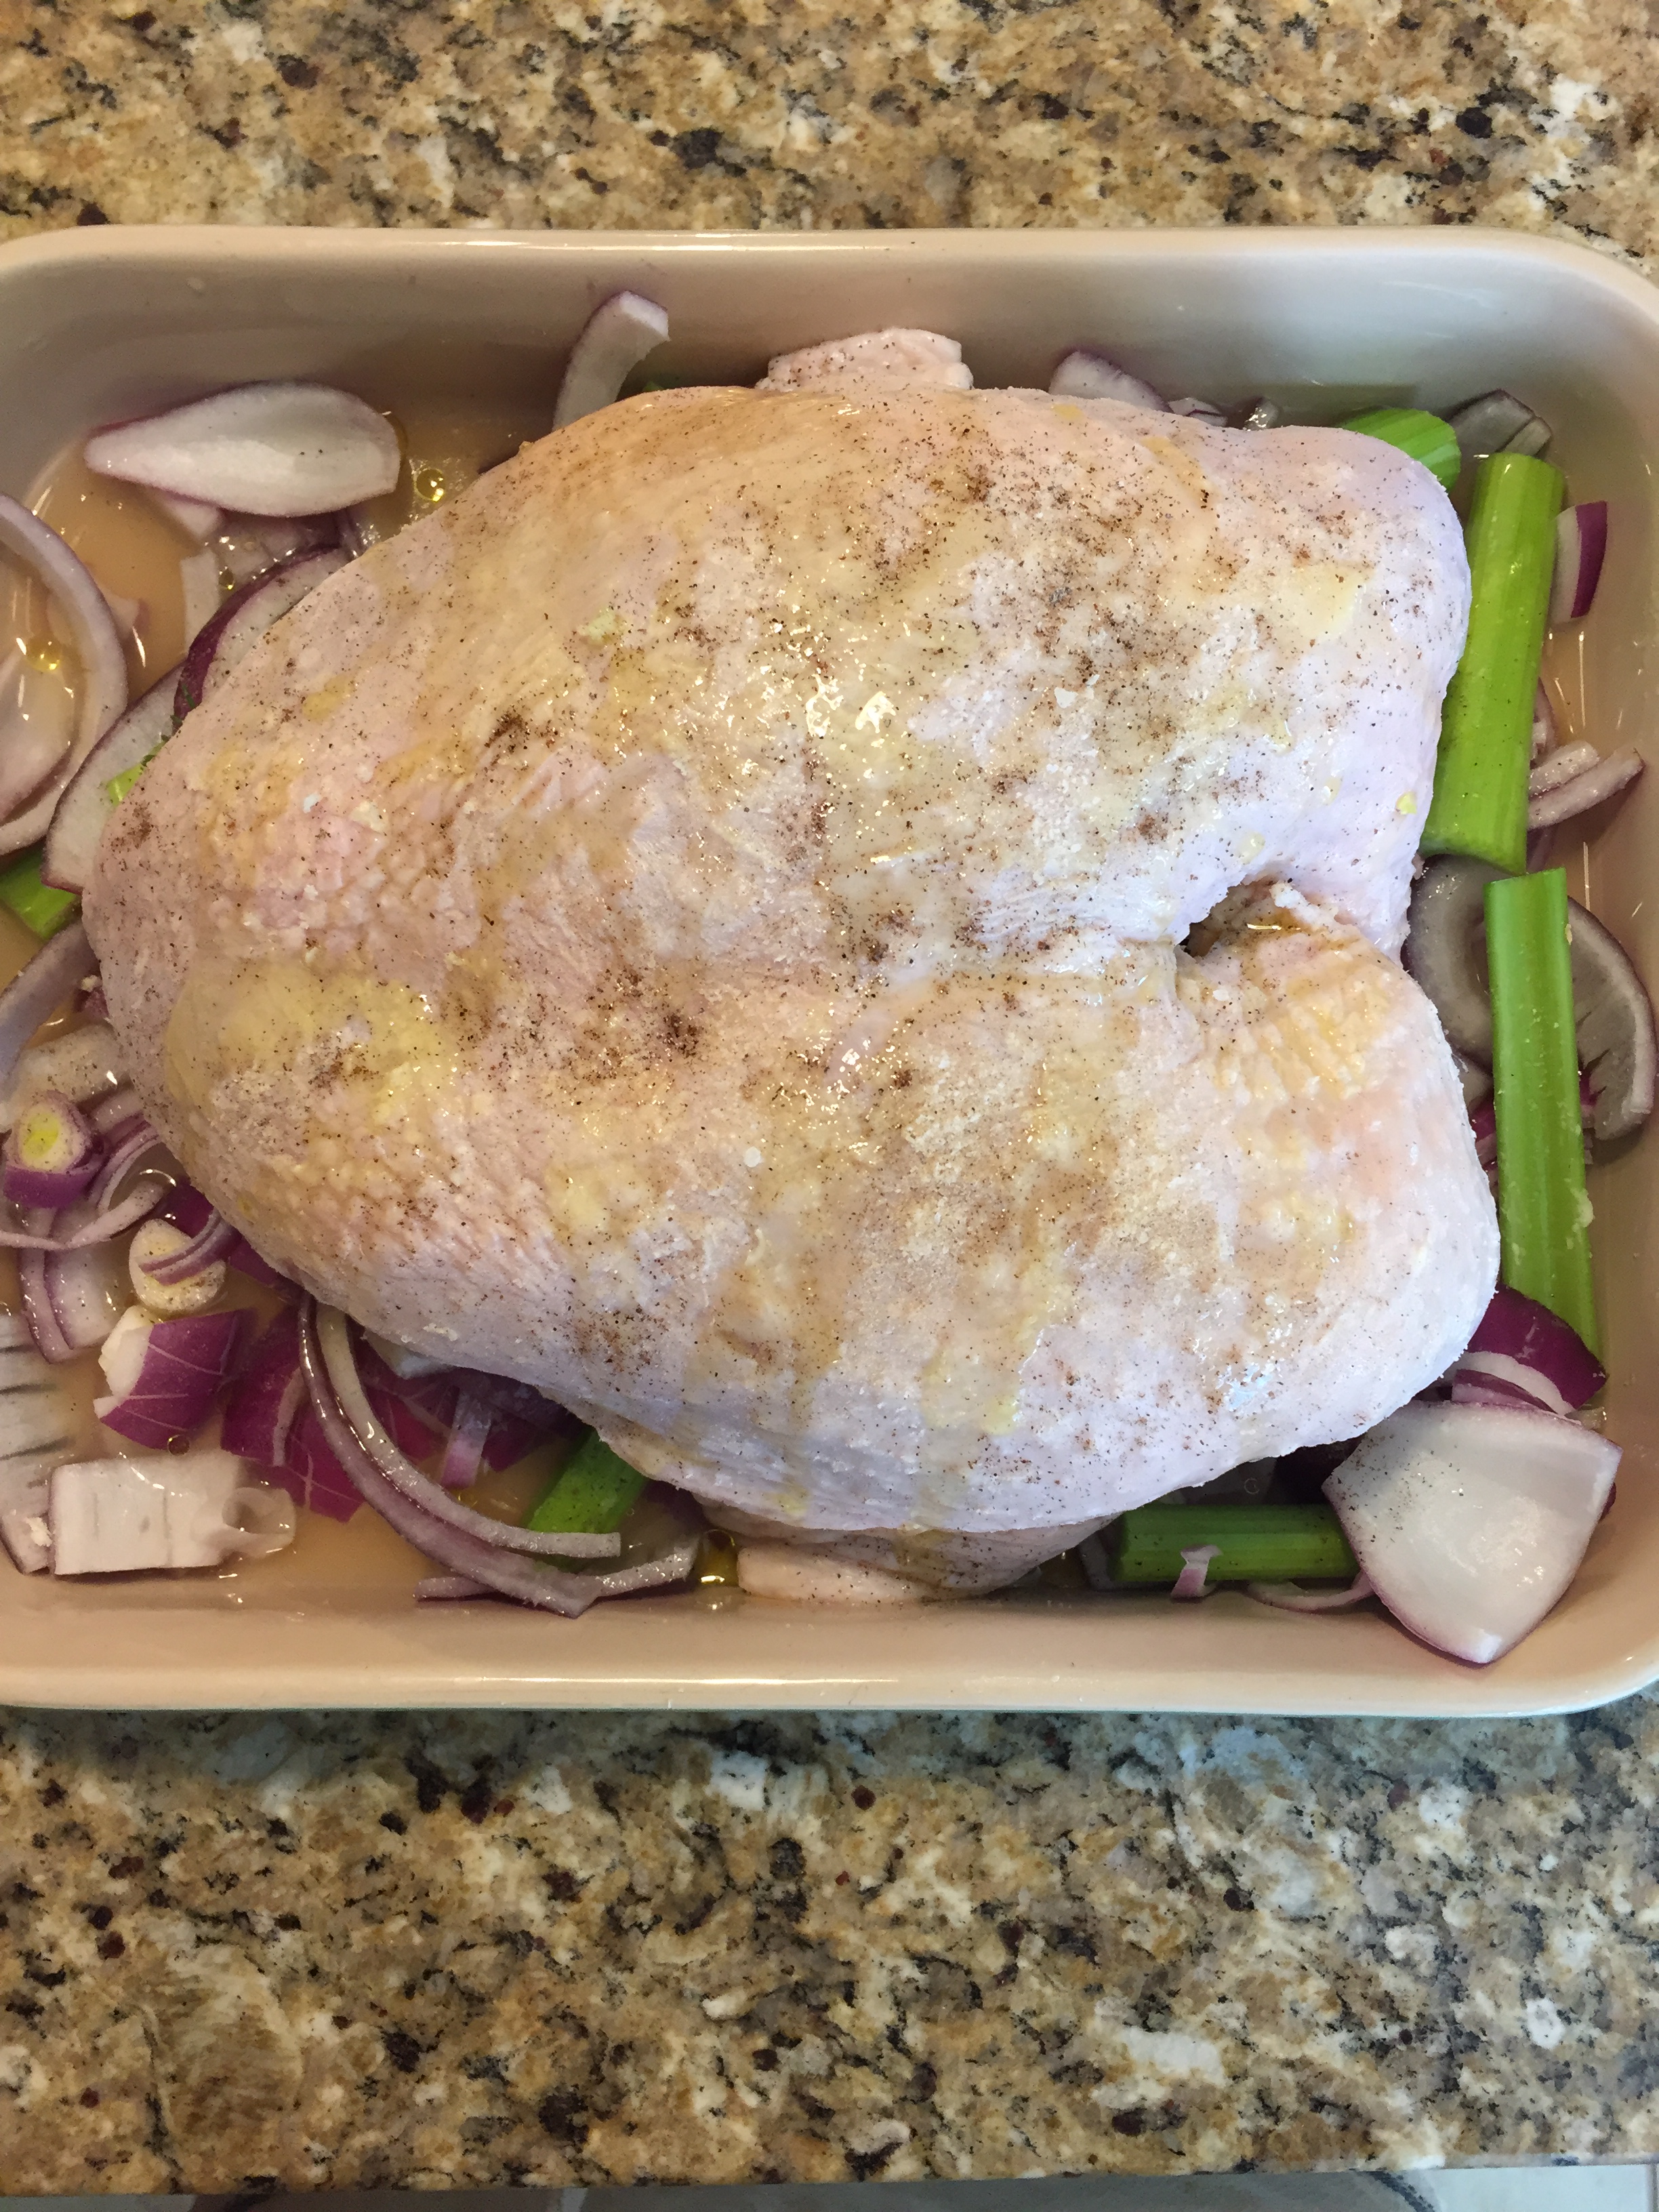
I had cooked my turkey breast (I always use bone-in) simply with some salt, white pepper and butter, but it was that Sage Butter Broth alone that made the turkey so flavorful and juicy.  I even kept it a secret from my family – I mean, taste-testers.  It was my dad – I mean, the tall man at the table that said it first, “This turkey is so juicy.”

So now, it’s decided that the Sage Butter Broth will be on the ever-so-most-important back burner this Thanksgiving.  Making all the meat herby and buttery and juicy and delicious!

Enjoy!

*****

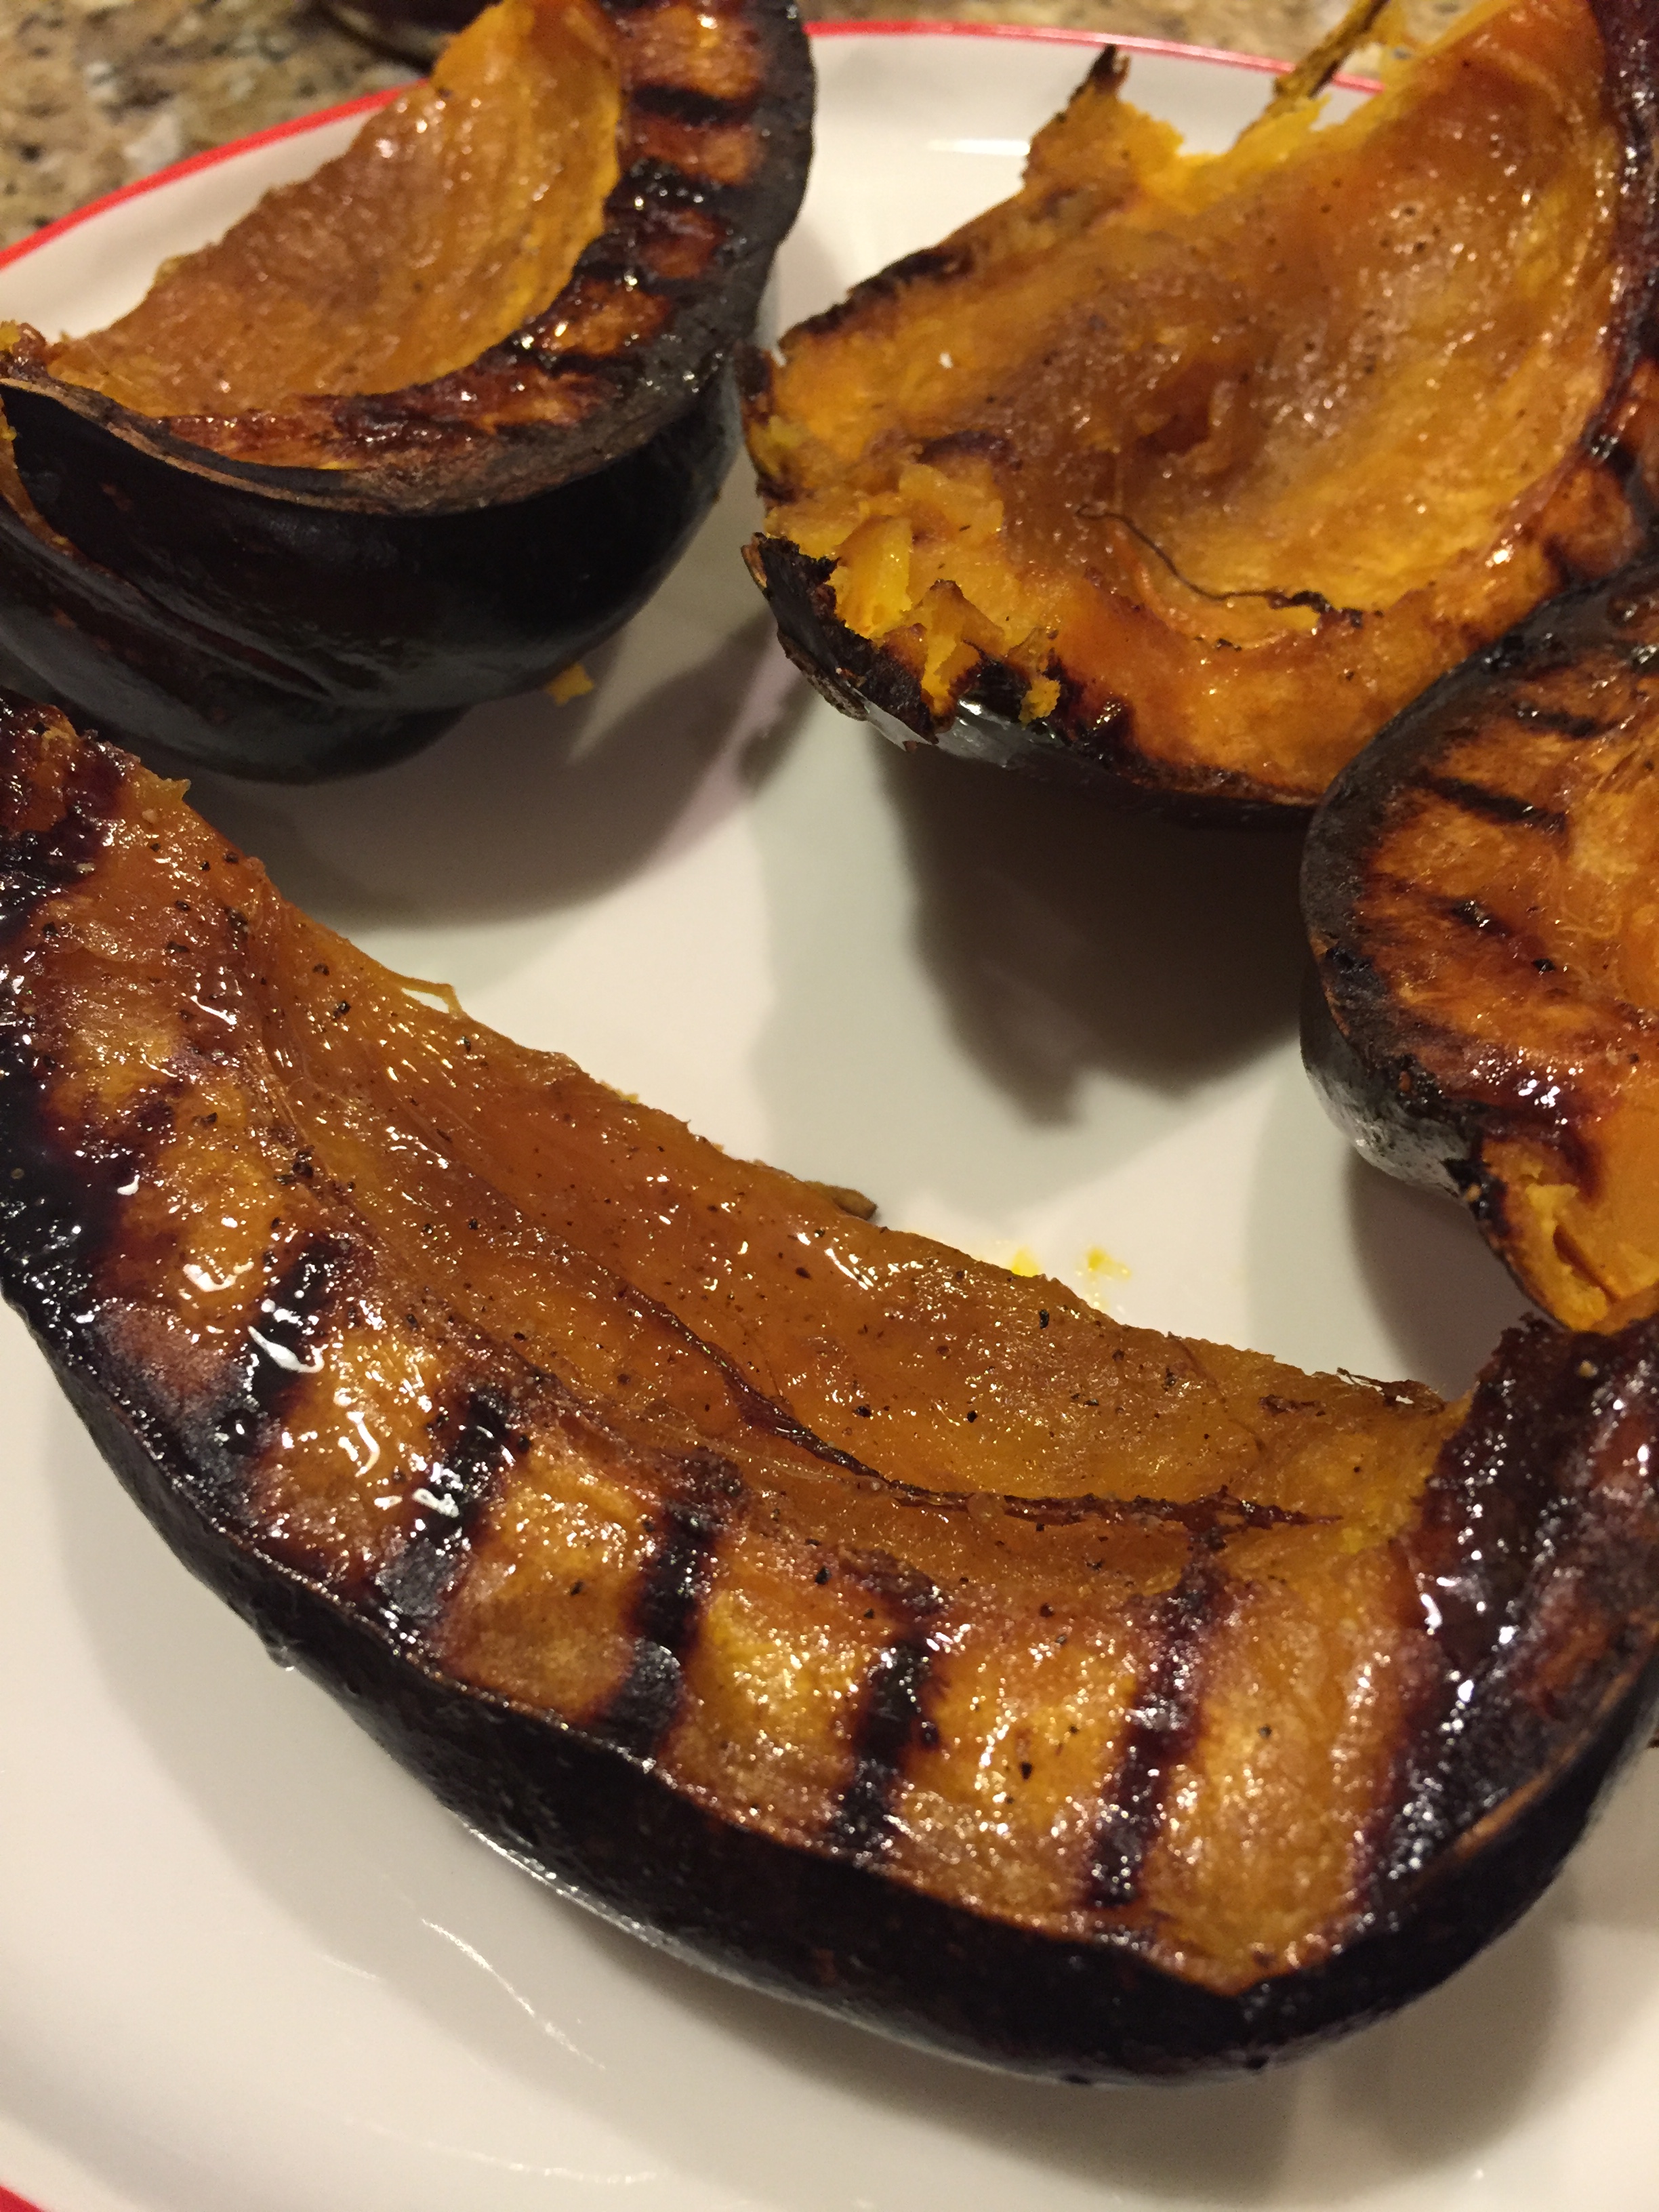
Oh, you all are so, so lucky.  The hubs cooks again!  Maybe my Turkey Day Trials have started to rub off on people because Rob has created another fantastic addition to our Thanksgiving table: Grilled Acorn Squash (I asked him if he would want to write a blurb, but he politely declined, so I’ll do my best to recreate his masterpiece).  For all you grillers out there, he halved an acorn squash then seasoned it with olive oil and s&p.  He cooked it flesh-side down first (about 10 minutes), then flipped it, all on indirect heat (he says that detail is important).  After about 20 more minutes, the squash was tender and ready for a make-shift glaze of butter, brown sugar, bourbon, maple syrup, and lemon juice.  After glazing the flesh of the squash, he left it to caramelize for about 5 more minutes, then cut it into fourths and plated it.  These grilled squash are legit.  They are not-your-standard-pilgrim-yeah-Squanto-only-wishes-he-thought-of-this DELICIOUS.  Enjoy!

img_4762

Turkey Day Trials 2016

16 Nov

img_4709

Here we go again, folks!  It’s Turkey Day Trials, 2016!

I’m going to invite the teacher to the blog for a moment and grace all of you with a brief history of the tradition.  Turkey Day Trials dates all the way back to November 2010 with culinary experimentation to prepare for the most anticipated foodie day of the year.  It started with prepping for the first Thanksgiving I prepared, lead to grocery store meltdowns, microwaved turkey breast, Kindergarten Turkey cooking (ironically, the frustration of being volun-told to cook for an elementary school “feast” taught me how to make the best bird), appetizers and dips galore, berry mistakes, and finally, comfort food leftovers.  There have been ups and downs, but all have been fun (except last year when I had the stomach flu and could barely scarf down the stuffing).

Clearly, I love Thanksgiving.

So this year’s Turkey Day Trial kind of happened on accident.  By my husband.

Yes, credit is due where credit is due and Chef Robert II (Chef Robert I is my dad.  And it’s pronounced Ro-BEAR by the way) came up with a most fantastic, keep in the fridge all season long, use on everything Pumpkin Butter.  It’s really amazing.

The other day, I just happened to add a bit of spice to that Pumpkin Butter and used it with some braised greens and mushrooms, making one of the best accidental Thanksgiving-worthy-yes-it-will-be-on-my-fancy-table-this-year side dishes ever.  Yes, I said it – EVER.

Sig (the dog) would disagree, but pumpkin by itself isn’t all that flavorful.  It’s a little musty and calls for brightening.  Sweetness and warm spices give pumpkin its quintessential autumn flavor, and in this recipe, water is added to turn the clumpy pumpkin into that silky, smooth, glazy texture fruit “butters” are known to embody.

The Pumpkin Butter is easy: 1 can of pumpkin puree, 1 c of water, 4 tbsp sugar, ¼ c brown sugar, ¼ tsp each of nutmeg, cinnamon, and pumpkin spice.  Mix all together in a sauce pan, and heat until the puree and the water have formed a smooth, silky consistency.  That’s it! 

Now, I did mention that I spiced this baby up.  To ¼ a cup of the Pumpkin Butter, I added 5-6 dashes of my favorite hot sauce: Tapatio.  Honestly, the chili spiciness mixed with the sweetness and nutmeg-y goodness is a flavor I can’t get enough of.  Granted – important note from Chef Robert II here – if you are going to use this Pumpkin Butter in coffee for an excelled Pumpkin Spice Latte, please omit the Tapatio.  That would just be silly.

So, onto the Turkey Day Trial side dish.

Southerners loooooove their braised greens.  Collards, actually, and I just can’t jump on that bandwagon.  This isn’t for lack of trying – I’ve had collards every which way.  But I simply do not like them, Sam I am.

But, in an accidental mix up of wild mushrooms and kale, a bit of sherry vinegar, plumped dried cranberries, and a drizzle of salt and honey, I found a sturdy cooked greens dish that could kick the chlorophyll out of those darn collards any day.  Also, it speaks heavily to my Scandinavian roots and Pacific Northwest taste buds, so there’s that for the sake of full disclosure.

Kale, basking in its endless superfood limelight, is softer than collards but still cooks well keeping integrity (it doesn’t disappear like spinach) and offering a bit of sweetness.  The mushrooms, oh the mushrooms, when those buggers are cooked till they just can’t be cooked anymore, they are amazing.  Browned, nutty, addictive; they taste like the smell of the woods next to the ocean after it’s just rained.  It’s a trick I’ve learned from my mom – let the mushrooms be.  Well, my mom and Paul McCartney.

Then – wait for it – I drizzled the Spicy Pumpkin Butter over the greens.

Un.  Bel.  Ievable.

I turned that one dish into a couple different things (Thanksgiving leftover ideas coming!  Hint hint, wink wink!).  I poured the greens on top of creamed barley for an earthy grain bowl, and I also pulled out a breakfast by shmearing some cream cheese on toast, topped with the greens and pumpkin butter, then “garnished” with a fried egg.  Again – delicious.

Time is running out on Thanksgiving countdowns, but luckily these gems are no fuss.  Rob’s Pumpkin Butter and my Mushrooms and Kale are perfect for your holiday feast.

img_4715

Mushrooms and Kale
(makes a lot, but you’ll need a lot)

  • 1 bunch curly kale (usually 7-8 stalks are in a bunch), leaves only, thinly sliced
  • 1 pint crimini mushrooms, sliced
  • 1 pint shitake mushrooms, sliced
  • 1 pint chanterelle mushrooms, sliced
  • ¼ c sherry vinegar
  • ¼ c water
  • 1/8 tsp ground nutmeg (freshly grated is better, but do just a bit less)
  • ¼ c dried cranberries
  • 1 tbsp really good local honey
  • 3 tbsp butter
  • s&p

In a large sauté pan, melt the butter over medium heat.  Add all the mushrooms and DO NOT yet season.  Stir the mushrooms, let them absorb the butter, and then finally release their own juices (without the help of salt).  Once the mushrooms start to caramelize, lower the heat to medium-low, and stir occasionally, letting the mushrooms brown, and then brown some more.  Once they are fully caramelized (and considerably smaller) lightly season with s&p.  Turn up the heat to medium, and pour in the sherry vinegar to deglaze the pan.  Once the vinegar has reduced to almost gone, add in the water and the kale.  Season with a bit more s&p, nutmeg, and add the cranberries.  Once the kale has cooked (it will wilt a bit, still look wrinkly, and have a dark green color), and the cranberries have plumped, turn off the heat.  Drizzle over the honey, and serve. 

Enjoy!

How to Explain Cooking

20 Sep

IMG_2542

Every year, without fail, the exact same thing happens the first day in Kindergarten:

“Who knows the sound the ‘M’ makes?”
“I do, I do…mmmmmmmmm.” I cringe as 18 surprisingly-loud-considering-their-size 5-year old voices shout at me.
“Wait, wait, wait, friends. You have to raise your hand to answer the question. So let’s try again. What sound does the ‘M’ make?”
Then right on cue: “Mmmmmmmmmmm,” 18 surprisingly-loud-considering-their-size 5-year old voices continue to shout at me all with hands up in the air.

My bad.   Nowhere in my explanation did I state that the kids have to be quiet while raising their hands so I can call on one of them. Kids are so literal. They are also blatantly truthful:

“The reason I’m late is because my mommy had to put her bra in the dryer.” Or, “You aren’t an old lady, but you do have wrinkles.” Or (amidst uncontrollable Friday morning sobbing), “I’m…. so….. tired.”

That last one I could relate to perfectly, and almost started sobbing myself out of sympathy and understanding. However, I’m happy to report that after five weeks into the school year, we are raising our hands to answer questions, and continuing to learn – together.

Having spent hours upon hours of advanced collegiate learning about writing, expression, and both written and verbal communication, as well as hours upon hours of putting those skills to use, the hands raising situation is a perfect example of how the lack of such a small detail can simply mess up everything.

Cooking is the same way. I have a good friend, Laura – and no, names have not been changed to hide identity – Laura asked that I specifically refer to her by name. She said being mentioned in my blog would make her famous (while I don’t think Laura knows that I only have 48 subscribers, I love the sentiment!). Laura has a hard time with the culinary arts, and frankly, like most who struggle in the kitchen, she dislikes the act of cooking. So over the past couple of years, I have tried to help her out by showing her easy cooking tricks, making her meals to introduce food she thought she didn’t enjoy, and provided recipes for potlucks and such. While most every time I’ve received an OMG-happy type phone call or text about the food, there have been a couple like this:

“So how did the lemon and lavender cocktail turn out?”
“Well,” uh-oh. The extended “well” is never a good sign. “The recipe said the word ‘syrup.’”
“Yes, the directions said to boil the water, sugar, lavender and lemon to make a simple syrup.”
“Yeah. I don’t know what that is. I read ‘syrup.’”
“So?” (Cue blonde moment; I had no idea where she was going with this, but I think most people probably would have.)
“I added syrup.”
“Syrup?”
“Yes.”
“Like, maple?”
“Aunt Jemima, baby.”
“But the directions didn’t say to add maple syrup!”
“But the directions SAID syrup!”

My bad, again.

I think it happens quite often when the inside thought doesn’t match the outside output. Which, in turn, always creates a learning experience. For Laura, she learned what a simple syrup is, and to only put in a recipe specifically what is on the ingredient list. I learned that if I’m going to use a cooking phrase, I might want to explain it as well.

Friday night’s meal reminded me of Laura, as she was adamant about telling me how she hated squash – that was until she had a spaghetti squash salad at my house. Prior to the meal, I was standing in line at the grocery store, and a woman asked me about the spaghetti squash I was buying and how to cook it. I explained the “oh it’s simple” way of cooking it flesh-side down to steam it up before turning it over to roast, and received a blank stare. The woman did not know what the flesh of the squash was. A necessary key detail!

IMG_2539So for Laura, for the lady at the store, and for all the times I’ve tried to explain something that was oh-so-obvious in (only) my brain, here’s my simplest, easiest, go-to, gluten-free, veggie-loaded meal that will leave even the worst cook feeling proud and satisfied: Roasted Spaghetti Squash. It’s perfect for this beautiful start to the autumnal season, and smells so yummy while cooking.

Roasting is high-heat cooking, usually in an oven. To roast a spaghetti squash, first preheat the oven to 425 degrees, and then prep the squash by cutting it in half vertically. A strong knife, like a 6-8 inch chef’s knife will work best. The inside will have seeds and pulp like a pumpkin. Using a spoon, scrape out the seeds and pulp and discard. The inside of the squash is the flesh, beautiful and yellow, and season the flesh with 2 tbsp of olive oil and ½ tsp of salt for each side. Place the squash halves open side down on a baking sheet, and roast in the oven for 15 minutes. Then, using kitchen tongs, turn over the squash halves so the open side is facing up. Continue to roast the squash for about 20-25 minutes, or until the flesh of the squash is tender enough to be pricked easily with a fork. Remove from the oven and let cool until able to handle. Then, holding the squash with one hand and a fork in the other, scrape the spaghetti squash starting at the top and pulling the fork down. The flesh will pull off in a noodle-like form, and voila! Roasted Spaghetti Squash!

From here, the options are endless for serving the squash:

* melt a stick of butter, whisk in lemon juice from one lemon, and add thyme leaves in a pan and pour over the squash for an easy side dish.
* shave fresh parmesan and crack fresh pepper over the squash and mix with arugula, basil, and dried cranberries for a tasty salad.
* mix with a favorite tomato sauce for a faux-spaghetti dish.
* add it to a turkey sandwich for a sweet, Thanksgiving-y taste.
* stir into a favorite curry sauce and serve over cooked lentils for an exotic meal.
* mix in some crunchy bacon, fry up an egg to top, and enjoy a healthy carbonara alternative.

For my, eh-em, many readers out there that will inevitably make Laura famous, I have taken these cooking lessons to heart, and have started to learn how to talk about cooking more specifically. After all, the last thing we need is any more kitchen mishaps when cooking can be so much fun and so rewarding. So please, try the squash, and let me know how it turned out!

Enjoy!

IMG_2552